Irresistible Salted Caramel Tart: Sweet, Salty & Silky
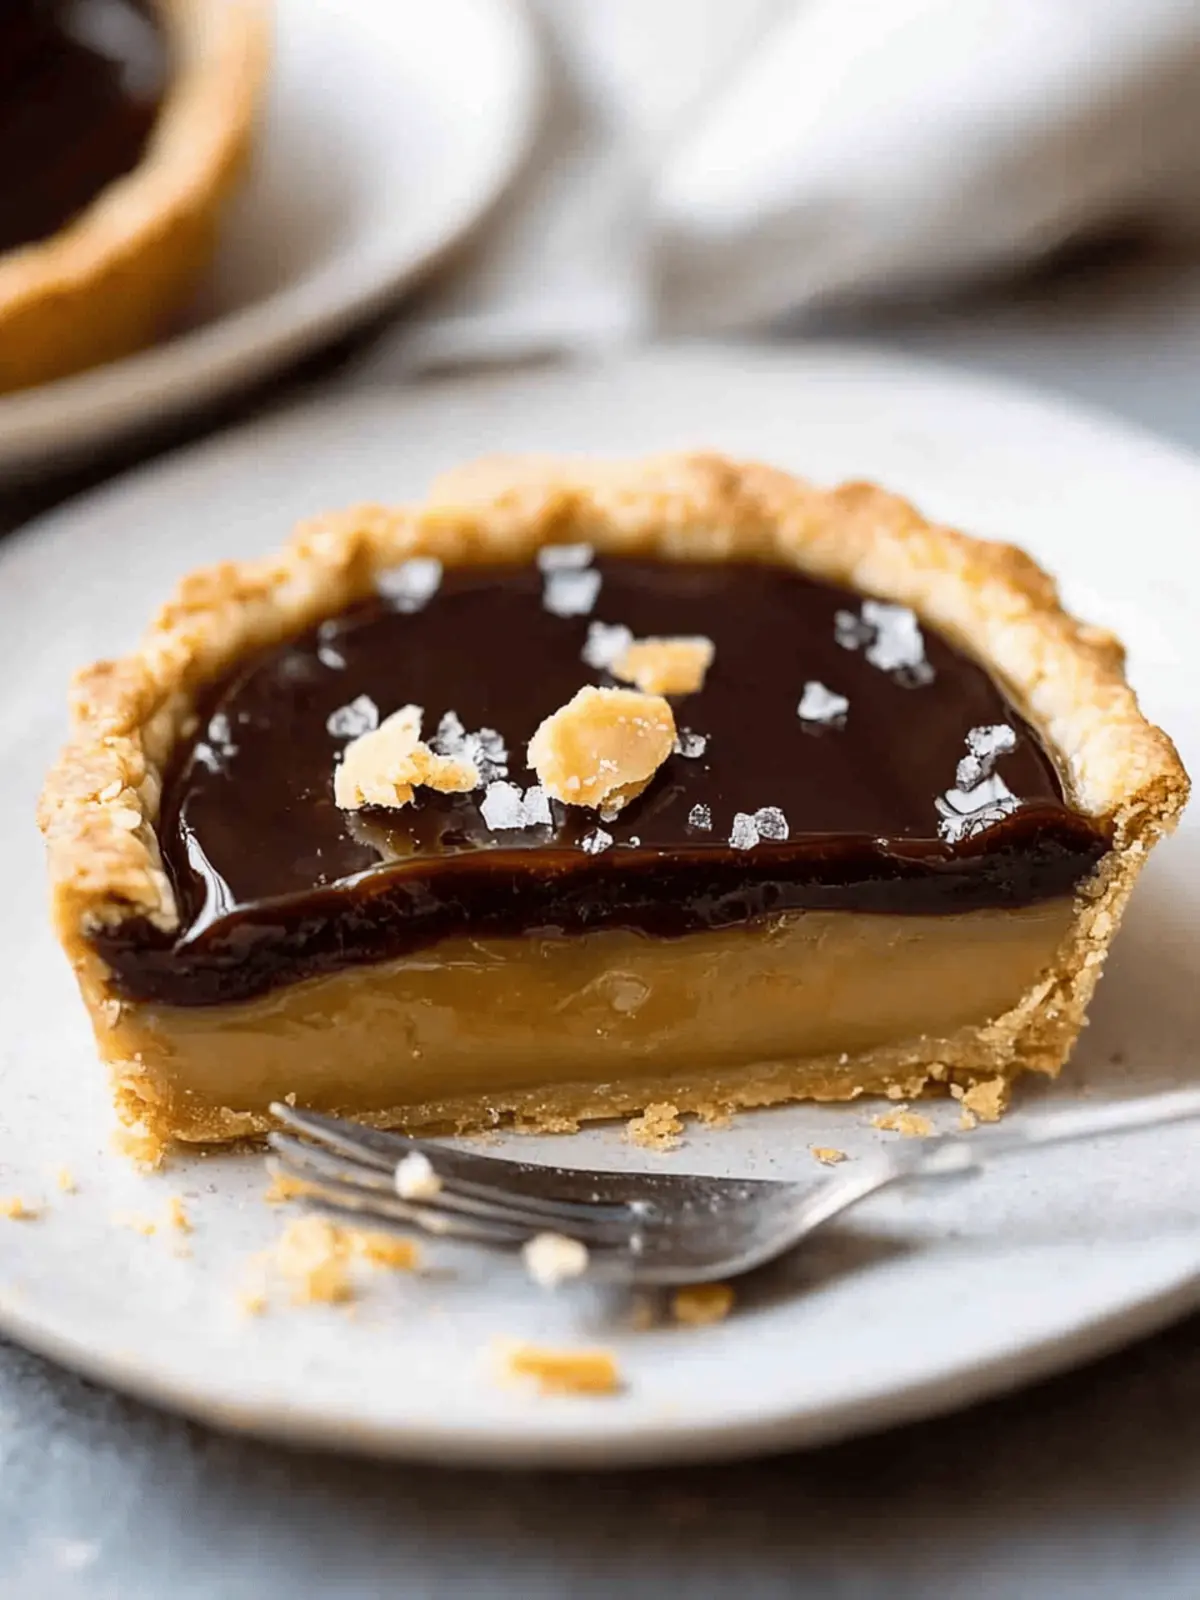
There are certain flavor combinations that simply transcend trends, remaining eternally beloved. Salted caramel is undoubtedly one of them. That exquisite dance between rich, buttery sweetness and a sophisticated pinch of sea salt creates a culinary symphony that captivates the palate. Imagine that glorious flavor translated into a cool, creamy, and utterly effortless dessert: the
salted caramel ice cream tart. This isn't just a dessert; it's an experience – a luxurious yet approachable treat that promises to melt away stress with every silky, sweet, and salty bite.
Whether you're a seasoned dessert maestro or someone seeking a show-stopping creation without hours slaving in the kitchen, this tart delivers. It combines an elegant presentation with surprising ease of preparation, making it perfect for impromptu gatherings, sophisticated dinner parties, or simply a well-deserved personal indulgence. Say goodbye to complicated baking schedules and fussy techniques; the irresistible allure of a salted caramel ice cream tart lies in its simplicity and profound satisfaction.
The Magic Behind the Salted Caramel Ice Cream Tart
The charm of a
salted caramel ice cream tart begins with its fundamental components, each playing a crucial role in creating a harmonious whole. While many might reach for a ready-made caramel ice cream, the secret to true caramel "punch" and superior flavor often lies in a more intentional approach.
Firstly, let's talk about the base. Instead of caramel ice cream, which can sometimes lack intensity or be overly sweet, the magic truly unfolds when you start with a high-quality vanilla bean ice cream. Vanilla acts as the perfect canvas, its delicate floral notes providing a beautiful backdrop that allows the bold, complex flavors of caramel to truly shine. When you swirl a luscious caramel sauce through vanilla bean ice cream, you gain control over the caramel’s distribution, ensuring pockets of intense flavor that contrast beautifully with the creamy vanilla. This method not only offers a more dynamic taste but also opens up possibilities for customized,
refined sugar-free salted caramel ice cream tart recipes by using homemade coconut caramel sauce and dairy-free ice cream alternatives.
Secondly, the "salted" aspect is non-negotiable. A sprinkle of flaky sea salt isn't just for show; it's a critical flavor enhancer. Salt doesn't just make things taste salty; it actually amplifies sweetness and balances richness, preventing the dessert from becoming cloying. The textural contrast of delicate salt crystals against smooth caramel is also a delightful surprise.
Finally, the "no-bake" nature of many salted caramel ice cream tarts makes them an absolute dream. Especially during warmer months, the thought of turning on the oven can be daunting. A no-bake ice cream tart eliminates this concern entirely, making it an ideal summer dessert and incredibly quick to assemble. In fact, many variations can be ready in about an hour of active prep, excluding freezing time. For more on this convenient approach, explore our guide to a
No-Bake Salted Caramel Ice Cream Tart: Quick & Easy. The ease of preparation, combined with the ability to make it days in advance, truly elevates this dessert to a league of its own.
Crafting Your Perfect Salted Caramel Ice Cream Tart: Ingredients & Customization
The beauty of the
salted caramel ice cream tart lies in its adaptability. While the core concept remains the same, you have ample opportunity to personalize it to your taste and dietary preferences.
The Foundation: A Flawless Crust
The crust is more than just a holder for the filling; it's an integral part of the flavor and texture profile.
*
Medjool Date Crust: For a naturally sweet, refined sugar-free, and incredibly caramel-forward base, a crust made from pitted Medjool dates and a few tablespoons of your favorite nuts (like pecans or almonds) is exceptional. Processed in a food processor, it forms a sticky, pliable dough that perfectly complements the caramel filling. This also makes the tart inherently dairy-free if paired with a dairy-free ice cream.
*
Classic Buttery Cookie Crust: For those who love a traditional approach, a crust made from crushed digestive biscuits, graham crackers, or even shortbread cookies mixed with melted butter creates a crisp, tender base. The key here is using *cold* butter if you're making a traditional flour-based pastry crust, as mentioned in the reference, to ensure flakiness, though for a crushed cookie crust, melted butter is ideal for binding.
*
Gluten-Free & Other Variations: Easily adapt by using gluten-free biscuits for the cookie crust, or explore nut-flour based crusts for a gluten-free and often grain-free option. Chocolate wafer cookies can also provide a decadent twist.
The Creamy Heart: Ice Cream & Caramel Swirl
This is where the magic truly happens.
*
Vanilla Bean Ice Cream: As discussed, starting with a good quality vanilla bean ice cream (store-bought or homemade) is crucial. If you're aiming for a dairy-free and refined sugar-free tart, consider making your own homemade coconut ice cream. Its creamy texture and mild flavor are ideal for letting the caramel shine.
*
The Caramel Sauce: This is the star. While store-bought caramel sauce offers convenience, making your own offers unparalleled flavor and customization. A "no candy thermometer needed" caramel recipe, such as a coconut caramel sauce, is perfect for achieving that rich, deep flavor without the fuss. This allows you to control the level of sweetness and, crucially, the salt content. Don't be shy with the salt; high-quality flaky sea salt added at the end of the caramel-making process provides bursts of briny goodness that cut through the richness.
Assembly & Expert Tips for a Flawless Finish
Creating a beautiful
salted caramel ice cream tart is straightforward, especially with a few insider tips.
1.
Tart Pan Preparation is Key: This is perhaps the most important tip for easy serving. Always line your tart pan (especially one with a removable bottom) with plastic wrap, ensuring plenty of overhang. This non-stick layer will allow you to effortlessly lift the entire tart out of the pan and onto a serving plate without any sticking, preserving its perfect shape. Once frozen, you can gently peel back and tuck any excess plastic wrap under the tart before serving.
2.
Pressing the Crust: Whether using dates or crushed cookies, press the crust mixture firmly and evenly into the bottom and up the sides of your prepared tart pan. Use the back of a spoon or your knuckles to ensure a compact and uniform layer. Freeze for at least 15-20 minutes to set.
3.
Softening the Ice Cream: To achieve that perfect, even caramel swirl, your ice cream needs to be softened. Let it sit on the counter for about 15-20 minutes, or in the refrigerator for around 30 minutes, until it's pliable but not fully melted. You want it scoopable, not soupy.
4.
The Caramel Swirl Technique: Gently fold in your caramel sauce. Don't overmix! The goal is distinct ribbons of caramel, not a uniformly caramel-flavored ice cream. Spread about half of the softened vanilla ice cream into the crust, drizzle with caramel, then top with the remaining ice cream and another drizzle. Use a knife or skewer to create elegant swirls by dragging it through the caramel.
5.
Freezing for Success: Once assembled, the tart needs ample time to refreeze. Place it in the freezer for at least 4-6 hours, or preferably overnight, to ensure it's firm enough to slice cleanly.
Serving, Storing, and Savouring Every Bite
The moment of truth arrives when your
salted caramel ice cream tart is ready to be unveiled. With its striking layers and glistening caramel top, it’s a guaranteed showstopper.
Effortless Presentation
Thanks to the plastic wrap lining, serving is a breeze. Simply remove the outer ring of the tart pan, then gently peel back the plastic wrap before transferring the tart to a cake stand or serving platter. For the cleanest slices, dip a sharp knife in hot water and wipe it dry between each cut. This creates smooth edges and prevents the ice cream from sticking.
Perfect Pairings
While divine on its own, a salted caramel ice cream tart welcomes accompaniments.
*
Fresh Fruit: Especially during late summer, the tart pairs beautifully with seasonal fruits like fresh peaches and blackberries. The slight tartness of the fruit cuts through the richness of the caramel. Raspberries or sliced bananas are also excellent choices.
*
Whipped Cream: A dollop of freshly whipped cream adds another layer of luxurious texture.
*
Additional Drizzles: A final drizzle of caramel sauce, perhaps a sprinkle of toasted pecans or chocolate shavings, elevates the presentation even further.
*
Beverages: Serve alongside a rich espresso, a sweet dessert wine, or even a glass of sparkling cider.
Storage for Future Indulgence
One of the greatest advantages of this dessert is its make-ahead potential. Once frozen, tightly wrap your
salted caramel ice cream tart in several layers of plastic wrap and then aluminum foil. It will happily keep in the freezer for up to a week, making it an ideal choice for entertaining as it reduces stress on the day of your event. Simply remove it from the freezer 10-15 minutes before serving to allow it to soften slightly for easier slicing.
Conclusion
The
salted caramel ice cream tart is more than just a recipe; it's an invitation to experience simple indulgence. It effortlessly marries the beloved sweet and salty notes of caramel with the refreshing creaminess of ice cream, all nestled in a delightful crust. Its no-bake nature, customizable ingredients, and make-ahead convenience make it a truly irresistible choice for any occasion. So, whether you're celebrating a special milestone or simply craving a moment of pure culinary bliss, dare to create this elegant and unforgettable dessert. You'll quickly discover why it becomes a cherished favorite, proving that some of the most impressive treats are also the easiest to make.